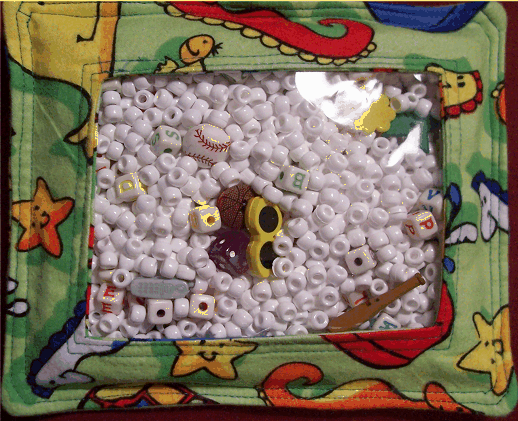
Alphabet Letters A thru Z
Purple Dice, a Key,
Brown Baseball Bat,
Yellow Flower, a Bee,
Red Heart, a Baseball,
Orange Butterfly,
Green Star, a Cell Phone,
Purple Grapes,
Red Apple, Bananas,
Basketball, a Red Car,
Yellow Sunglasses,
Red Ladybug, a Penny,
a Dime, a Nickel,
and a Quarter
1. Take the 1/4 yard of fabric and fold it over until it is 4 layers thick. This should leave you with a square of folded fabric approx. 9" by 10" or 11". Cut off the selvages and cut through the fold until you have 4 equal squares approx. 9" by 10".
2. Take the top two squares and put the right sides together so the back sides are showing.
3. With a pencil and a ruler mark approx. 2 1/4" in from all for side until you have a square drawn on the back of the fabric.
4.Machine stitch around this square and then stitch again over the original stitching to reinforce.
5. Cut the inside of the square out leaving a 3/8" seam allowance. Your fabric should now resemble a picture frame. Clip in towards (not thru)the 4 corners.
6. Turn the fabric to the right sides by separating the fabric layers and passing one of the layers thru the opening in the center. Now you should have a picture frame again but the right side of the fabric will be showing on both sides.
7. Cut the clear plastic approx. 1" bigger on each side than the opening (2" in total bigger than the opening)
8.Pin in place behind the opening and topstitch the plastic to the fabric in two rows of stitching as shown in the picture. This creates your "Peek-A-Boo" window. Double stitching ensures no beads will escape.
9. Take the remaining two pieces of fabric with right sides out and lay against the front side of the window. Stitch in approx. 1/2" all the way around the pocket leaving 3 or 4" open on one side to insert beads and novelties. Trim corners diagonally but not too closely.
10. Make a list of the novelties that you will be putting into the pocket.
11. Turn pocket right side out and add beads and novelties through the opening.
Fold in the raw edges of the opening and topstitch the opening closed and continue topstitching all around the edges of the pocket. After you complete the first round of stitching move in approx. 1/4" and make a second row of stitching around the perimeter of the pocket. Again, the double stitching is for ultimate safety.
12. ENJOY! Your pocket is now complete and ready to occupy the busiest little one!
For little girls use
little princess items like shoes, crowns, purses, magic wands, even things from their favorite fairy tales like magic apples, castles, unicorns, etc.
For little boys you can use small cars, dinosaurs, frogs, trucks, balls, bats, shoes, small tool buttons, dogs, stones, keys, etc.

