Heirloom Collage Jewelry
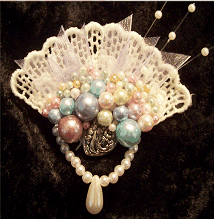
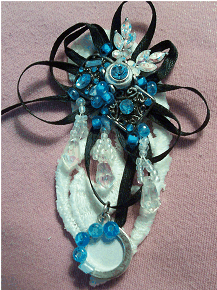
Heirloom Collage Jewelry is a fun and beautiful
expression of personal artistic creativity.  The designs
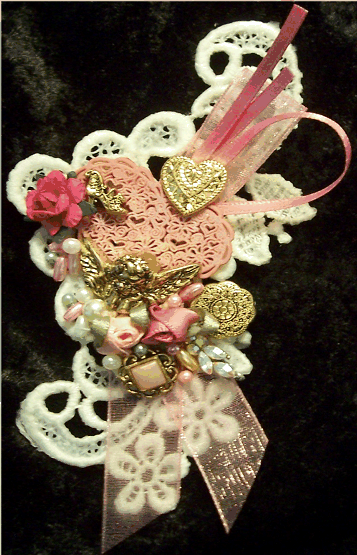
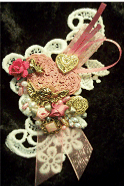
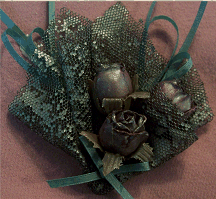
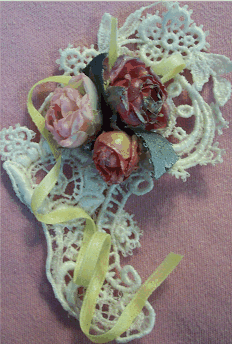
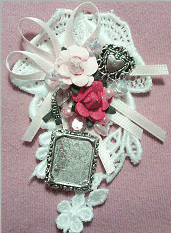
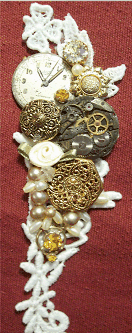
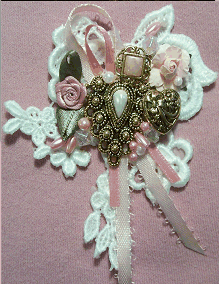
are unlimited.  I am showing several styles of pin back brooches  but this style of jewelry could also be made
into necklaces, barrettes, package toppers, Christmas
tree ornaments, wall decor,  and anywhere else your imagination takes you.  This is an excellent way
to use up bits and pieces of ribbons, left over buttons,
scrapes of lace and old jewelry.  I have given the basic   instructions for the samples shown but with your own creativity you can come up with variations to allow
you to explore the endless possibilities.  The pins can be personalized with small charms representing professions , hobbies, grandchildren, vacations, achievements, ancestors and memories.  Warning: Collage jewelry can be addictive!
Fun items you
can use for
Collage Jewelry
:

Old Coins
Broken jewelry
Miniatures
Ribbon Roses
Lace Scraps
Ribbon Pieces
Beads & Pearls
Metal Findings
Pieces of Old Watches
Silk Flowers
Decorative Buttons
Chains
Small Keys
Stones
Sea Shells
Puzzle Pcs
Old Game Pcs
Scrabble Letters
Tiny Hinges
Silk Petals
Charms
Mini Picture       Frames
Scrapping Items
Embellishments
Anything Small
and Interesting
Collect them from everywhere such as thrift shops & tag sales
Instructions to create
Heirloom Collage Jewelry
Step 1 - Create a theme or color scheme for your piece.  Perhaps to match an outfit, to honor a friend or family member or something just for fun.
Step 2 - Select a base for the project.  You may use anything from a very stiff piece of cardboard to an old button.  I have chosen a lace applique that I have stiffened with Aleene's Fabric Stiffener according to directions.
Step 3- Choose your items to create the collage - anything from watch gears to movie tickets. Arrange the items loosely on the base to visualize how  your project will turn out.
I like to take a digital picture of the my layouts and then try several others designs to find my favorite.  The pictures allow me to review while creating so I don't forget my favorite layout.
Step 4 -Choose the proper adhesive for the project.  Hot glue is easy to use but not as durable.  Super Glue Gel is good but do NOT use the Super Glue Gel if you will have pearls, gems,
rhinestones or glass of any kind on the piece as it will cause fogging of the glass and you will loose all your sparkle.  For this type of embellishment find a rubber cement designed  for jewel and pearl attachment an I would even apply some to the back of a sample jewel or rhinestone and allow it to sit overnight to ensure that it did not fog the crystal.  Follow the instructions of your adhesive well.
Step 5 - Collect your tools and protect you work surface with wax paper (which will release the item if it accidentally gets glued to it). 
Your tools may consist of wire snips to cut off the button backs, cut chains and trim metals;
craft scissors and craft tweezers.  The rest of the tools you may need will depend on the items you have chosen to add to your piece.
Step 6- Refer back to your digital picture and begin adhering your items on beginning with the largest or most lower item and stacking outward.  Enjoy the process.  You may even want to try a practice project first to get the hang of the techniques and loose the nerves.
Step 7- Let dry until items will not "flex" anymore and then apply a pin back for Brooches.  Let your project dry completely- at

least 24 hours before wearing.  Your brooch will be sturdy but as with any piece of jewelry - do not abuse it.
Hints and Tips
If you have created a project using puzzle pieces or scrabble pieces or something other than jewels you may want to spray it with acrylic sealer.  There is even a pearlized spray available that will give your project a shimmer effect.  Do not apply a finish spray to any piece containing
jewels, glass, beads or pearls.

Start your layout with a larger or main focal point and then work out from that point.  Look at my examples and you can see what I mean. 

Don' underestimate the small accents such as a small ribbon curl or a bead or two in the right place. 

Remember balance does not mean symmetrical.
These pieces appear best if asymmetric.

The fabric stiffener used to stiffen the lace appliques can be tinted with color if you prefer a color instead of an ivory or white base.
Gift Ideas
Help someone remember a lost loved one by creating a pin featuring the favorite colors, hobbies & something that would trigger good memories of that person. Ex:If the person loved to cook,  put on a tiny spoon charm,  An animal charm for the animal lover, etc.  If this was a grandmother or mother maybe you have a handkerchief that you could use as the base or a broken piece of jewelry or old watch face.
Put on your thinking cap, browse the charm aisle at the craft store and you can come up with the perfect
Remembrance Pin!
*****************
How about a "New Grandbaby Pin"! Again find some baby charms or adorable buttons at the craft/fabric stores.  A little boy could be frog buttons, green and blue ribbon, a picture frame to show him off  and  some small scrapbook embellishments to give the date of birth!
Little girls would be perfect in ribbons and lace, pink and yellow and don't forget to check out the charms in the jewelry aisle for bottles, booties, diaper pins and of course a "Princess" charm.  What Grandma or new Mommie wouldn't love and treasure this unique gift!
*****************
Relay For Life Idea!
Of course, we always have a Relay For Life Idea!  Decorate your pin in Relay Purple ribbons and choose from a  variety of charms but of course include a survivors ribbon charm.  Spell out Really For Life in metal letters from the scrapbook section or the charm section.  This could be an awesome Relay fundraiser! 
****************
A perfect "Thank You"
Make up some of the fan pins shown above in a variety of styles. (The fan lace applique is available in several places or you can contact me for purchase information)  Pinto the fan to the front of a blank card and write inside

"Thank You" 
"From Your Biggest Fan"! 

What an awesome way to say thank you!
This pin was created by using lace that was stiffened and shaped at the same time the flowers were added so that the lace flows around the flowers.
The pin to the left was the first collage pin I ever made.  The flowers on this pin and the one above were stiffened with a product called Porcelain Petal.
It really does give the petals a look and feel of a lovely porcelain flower.  The ribbons were stiffened at the same time as the lace applique. 
The finished product was then sprayed with a pearlizing effect spray. 

Enlarge the above photo to see the details of the "HOPE" awareness ribbon and the mini photo frame that makes this a perfect Breast Cancer Awareness Pin.
Enlarge this photo to see the details of an antique watch face and watch workings along with some antique jewelry and vintage buttons.
Click here to see works of art from a recent
Collage Jewelry Workshop